How to organize your Google Drive so you’re all ready for next year.

re you and your school a little addicted to Google Drive?
I know I am. It’s just so easy to stick everything in there!
And don’t even get me started on how easy it is to share everything with your colleagues and students. Sharing documents has been a game changer!
Let me assure you that you are in good company if you have files and folders all over the place. There are millions of people just like you, who are a little overwhelmed by the amount of stuff that is just sitting there.
Take a look at these 7 tips to help you organize what you currently have in the Drive so that you are prepped and ready for next year.
- Create yearly folders for each course
In My Drive, I like to organize my files like this:

To create folders, just click on “+New > Folder”. Give it a name like “Spanish 5, 2020-21”. Now stick everything from that school year into that folder.
You can easily move multiple files by clicking on the first one, then holding down the Shift key and clicking on the second, third, fourth etc. That will highlight more than one file at a time. Now just drag the entire group of highlighted files into that folder.
Now create another folder called “Spanish 5 2021-22”. This will give you a clean slate to work from. Here is a little tutorial of what I just described:
Do this for all of your classes for some instant organization! You’re going to love the new clean space you just created!
If you have time, you can review all of the files, charts, PDFs, videos etc. and determine which ones you want to keep and which ones you can toss in the garbage. But if you don’t have time, just organize everything into folders right now. That’s the most important part.
2. Stay Consistent with Folder Names
When you create any folder, try to stay as consistent as possible with the name. For example, your classes can each have a master folder, such as:

But do not name one “ELA 2nd year” and the other “Level 4 ELA”. THAT is what makes your folders and files difficult to find. Plus, if they have similar names, they will be alphabetized next to each other, which also helps when doing a search.
3. Put everything in a folder
One of the keys to cleaning up your Drive is to create a nice “folder tree”. The top of the “tree” is “My Drive”, inside that are the class folders, inside those are the unit folders or student folders.
Something like this:

Do NOT leave all your resources “loose” in your Drive. When you have a long list of separate files, videos, PDFs, Sheets or Photos, it’s impossible to find anything! Plus, it’s frustrating, time consuming and messy. So, like I said, keep everything in folders.
4. Add your files to multiple folders
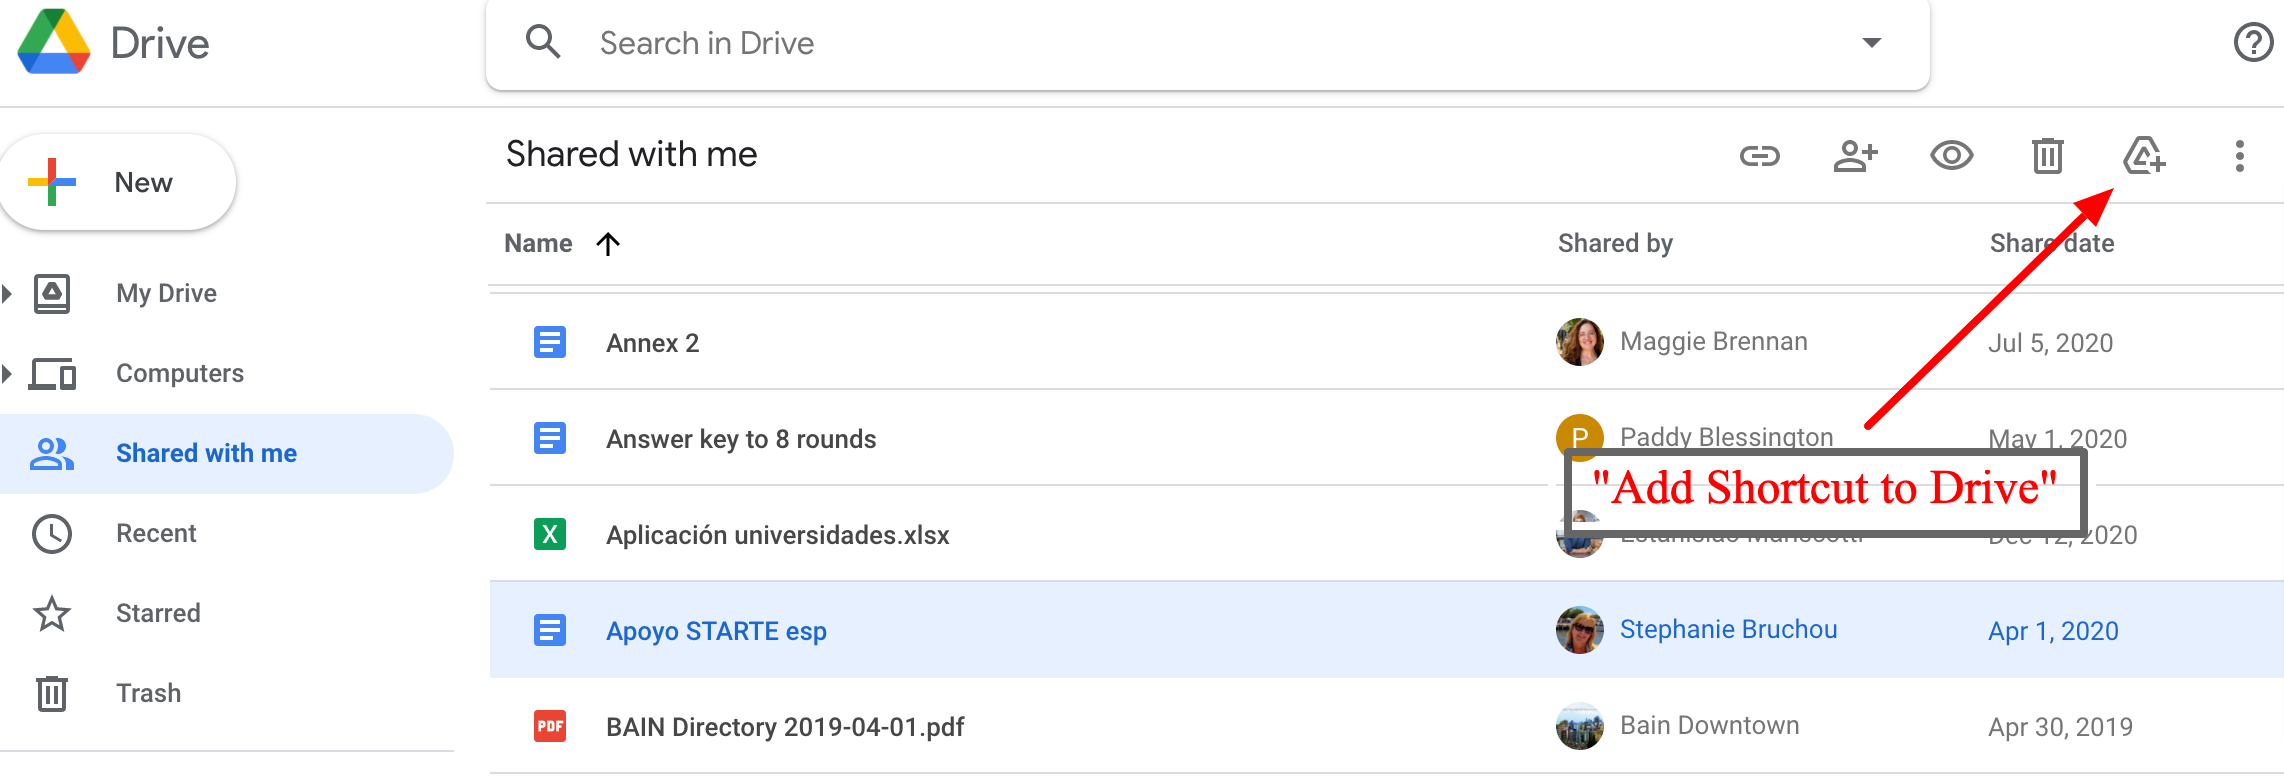
If you can’t decide what folder to add a file to, add it to multiple folders! This is the beauty of going digital. You don’t have to keep your resources in a paper file, you can keep one digital copy in multiple places. Select the file and click on “Add Shortcut to Drive”.

Don’t worry, you are not creating multiple files. You are creating multiple “access points” to the same file. That way you can easily find your important files in multiple folders!
5. Choose how you order your files
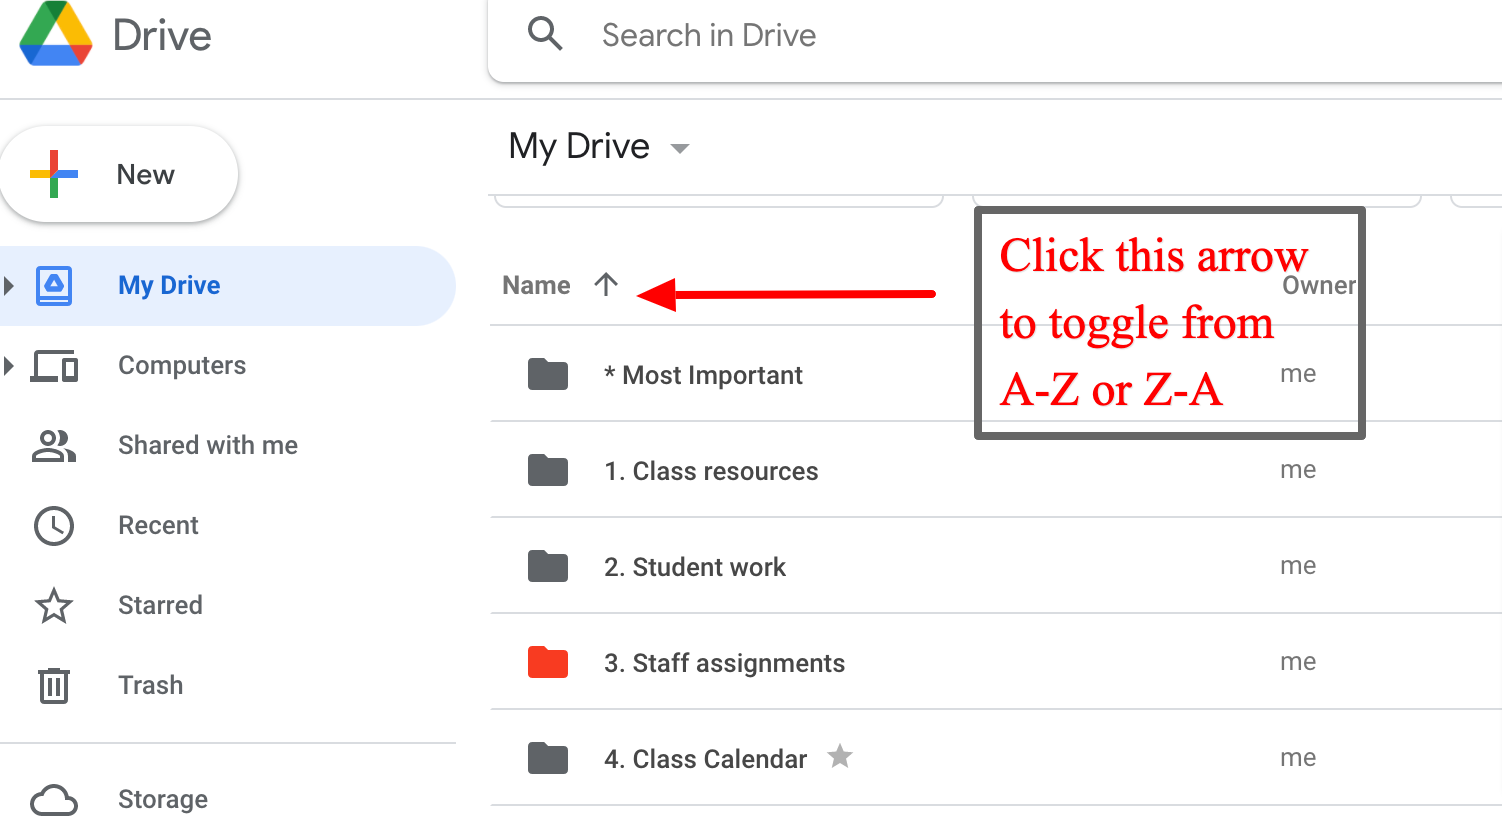
Google drive automatically puts all your files and folders into alphabetical order. It can be either A – Z or Z – A. You choose how you want to see it by clicking this arrow:

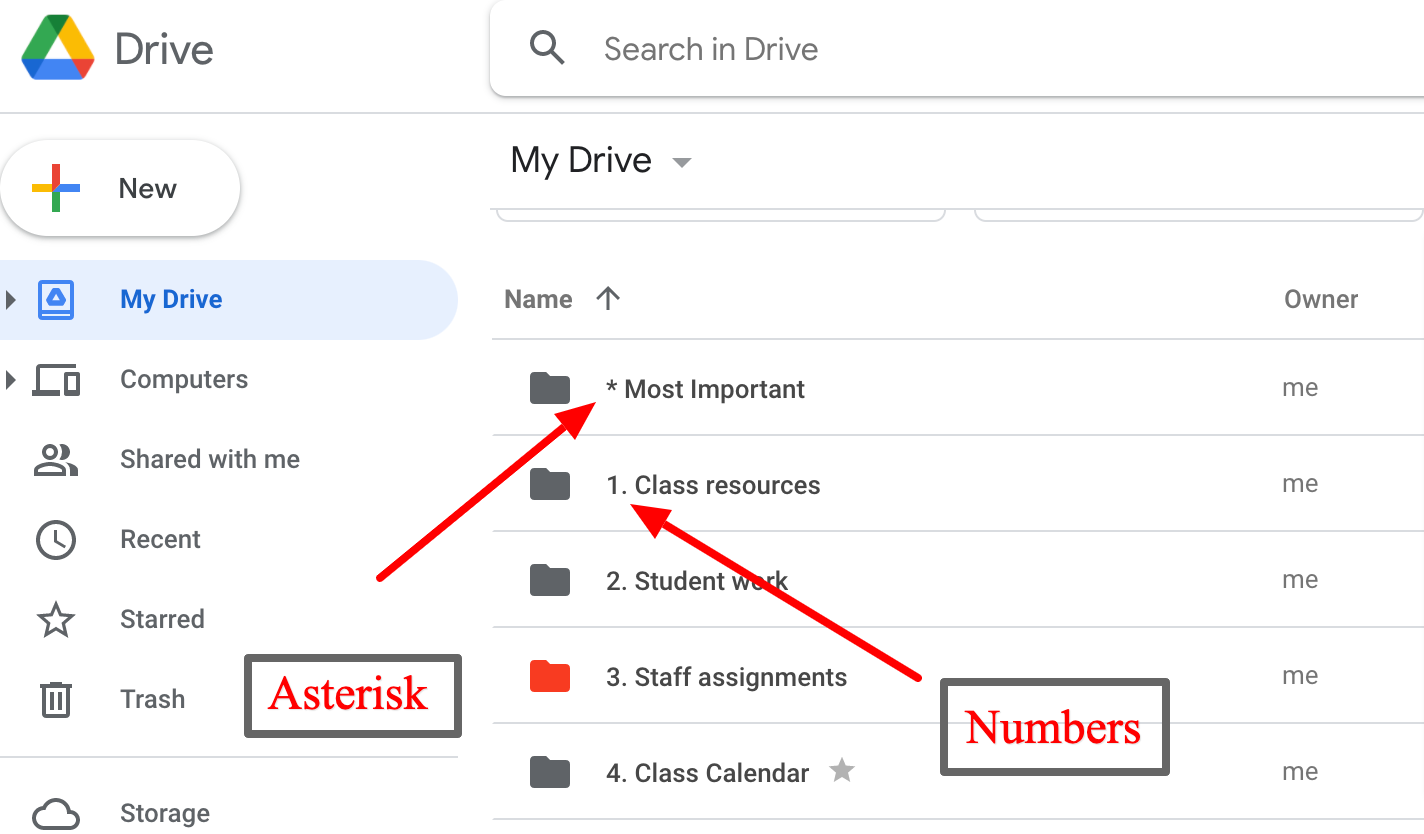
If you want to keep a file or a folder at the top, even though it doesn’t start with the letter “A” all you need to do is add an asterisk. Or you could add a number in front of the name. This way, you put it in the order you prefer. Like this:

6. Give it some color!
By right clicking on a folder and choosing “change color” you can make your folder stand out.
I like to keep most of my folders grey. I only change the color of the one I use the most. This way it really stands out and is easy to find. But other people like to change the colors of all of their folders to dress it up a bit!
Another idea is to keep a color “code” that is consistent across platforms. For example, “Math Level 3” has a purple folder. In Google Classroom, your “Math Level 3” has a purple banner, and any color photocopies you make have a purple “theme”. This helps you keep all the classes straight and helps the students keep it organized too!
7. Mark them with Stars
Another great way to make files or folders stand out is to give them a Star.
This can help in 2 ways.
- One – it’s easy to see the star as you are scrolling through your list of folders.
- Two – by adding a star, you can just click on the “Starred” button in the menu to the left and you will see all the files or folders that you have given a star to.
This is just another way to organize your files and folders more easily. That way you can find everything quickly too!
8. Leave “Shared with Me” alone
There is a huge difference between “My Drive” and “Shared with Me”.
My suggestion is to NOT to work from the “Shared with Me” drive for a couple reasons:
- You can’t organize or rename those files or folders
- It’s impossible to find anything in “Shared with Me” because the list is SO long.
- You can’t delete them (if you do, you may delete someone else’s file!)
So, this is what you should do. When someone shares a file or folder with you, highlight it, and click on “Add Shortcut to Drive”. This will put a link to the file in your “My Drive”. Once it is there, you can organize it better. You could put it in a folder related to that topic, for example. Just don’t change the name, because it will change the name for everyone who it is shared with!
Conclusion
The school year goes so fast (well, maybe this year was a tad longer than normal! ;). When we are busy and running around from 7 am to 7 pm, sometimes we just don’t have the time to organize our files and folders correctly. My suggestion would be to take a few hours now at the end of the year to look over all your resources. Follow the guidelines here to organize them correctly. That way you can easily find them when you need them. If you set up similar folders for next year, you’ll be all ready to go in August!
If you have any tips that you think I should include here, please write them below in the comments!
Want a Free Online Teaching Guide?
5 Simple Ways to Improve Online Teaching
Just subscribe below.
You can unsubscribe from the list at any time


